Coffee
With the global coffee consumption having surpassed the 10 Mill. Kilograms mark it is considered one of the most widely consumed beverages in the world, right after tea and water. With Starbucks and similar companies serving coffee even in the most remote areas, I believe that availability comes at the cost of quality and overall taste. This is why I stopped relying on served coffee and assembled my very own set of tools for brewing the type of coffee that I like, no matter the environment I’m currently in: A nomad’s coffee, no electricity required.

Over the past couple of years, coffee has grown to be a more than a quick caffeine fix in the morning. I started seeing coffee as less of a consumption good and began enjoying it more consciously, informing myself about its cultivation, the origin of the beans, the roast and of course the brewing processes. I’ve tried many different variants and tools, from pour-overs using paper filters as well as re-usable ones, over Moka pots and the famous AeroPress up to the supreme discipline of pulling shots on a portafilter machine.
Grinding Coffee
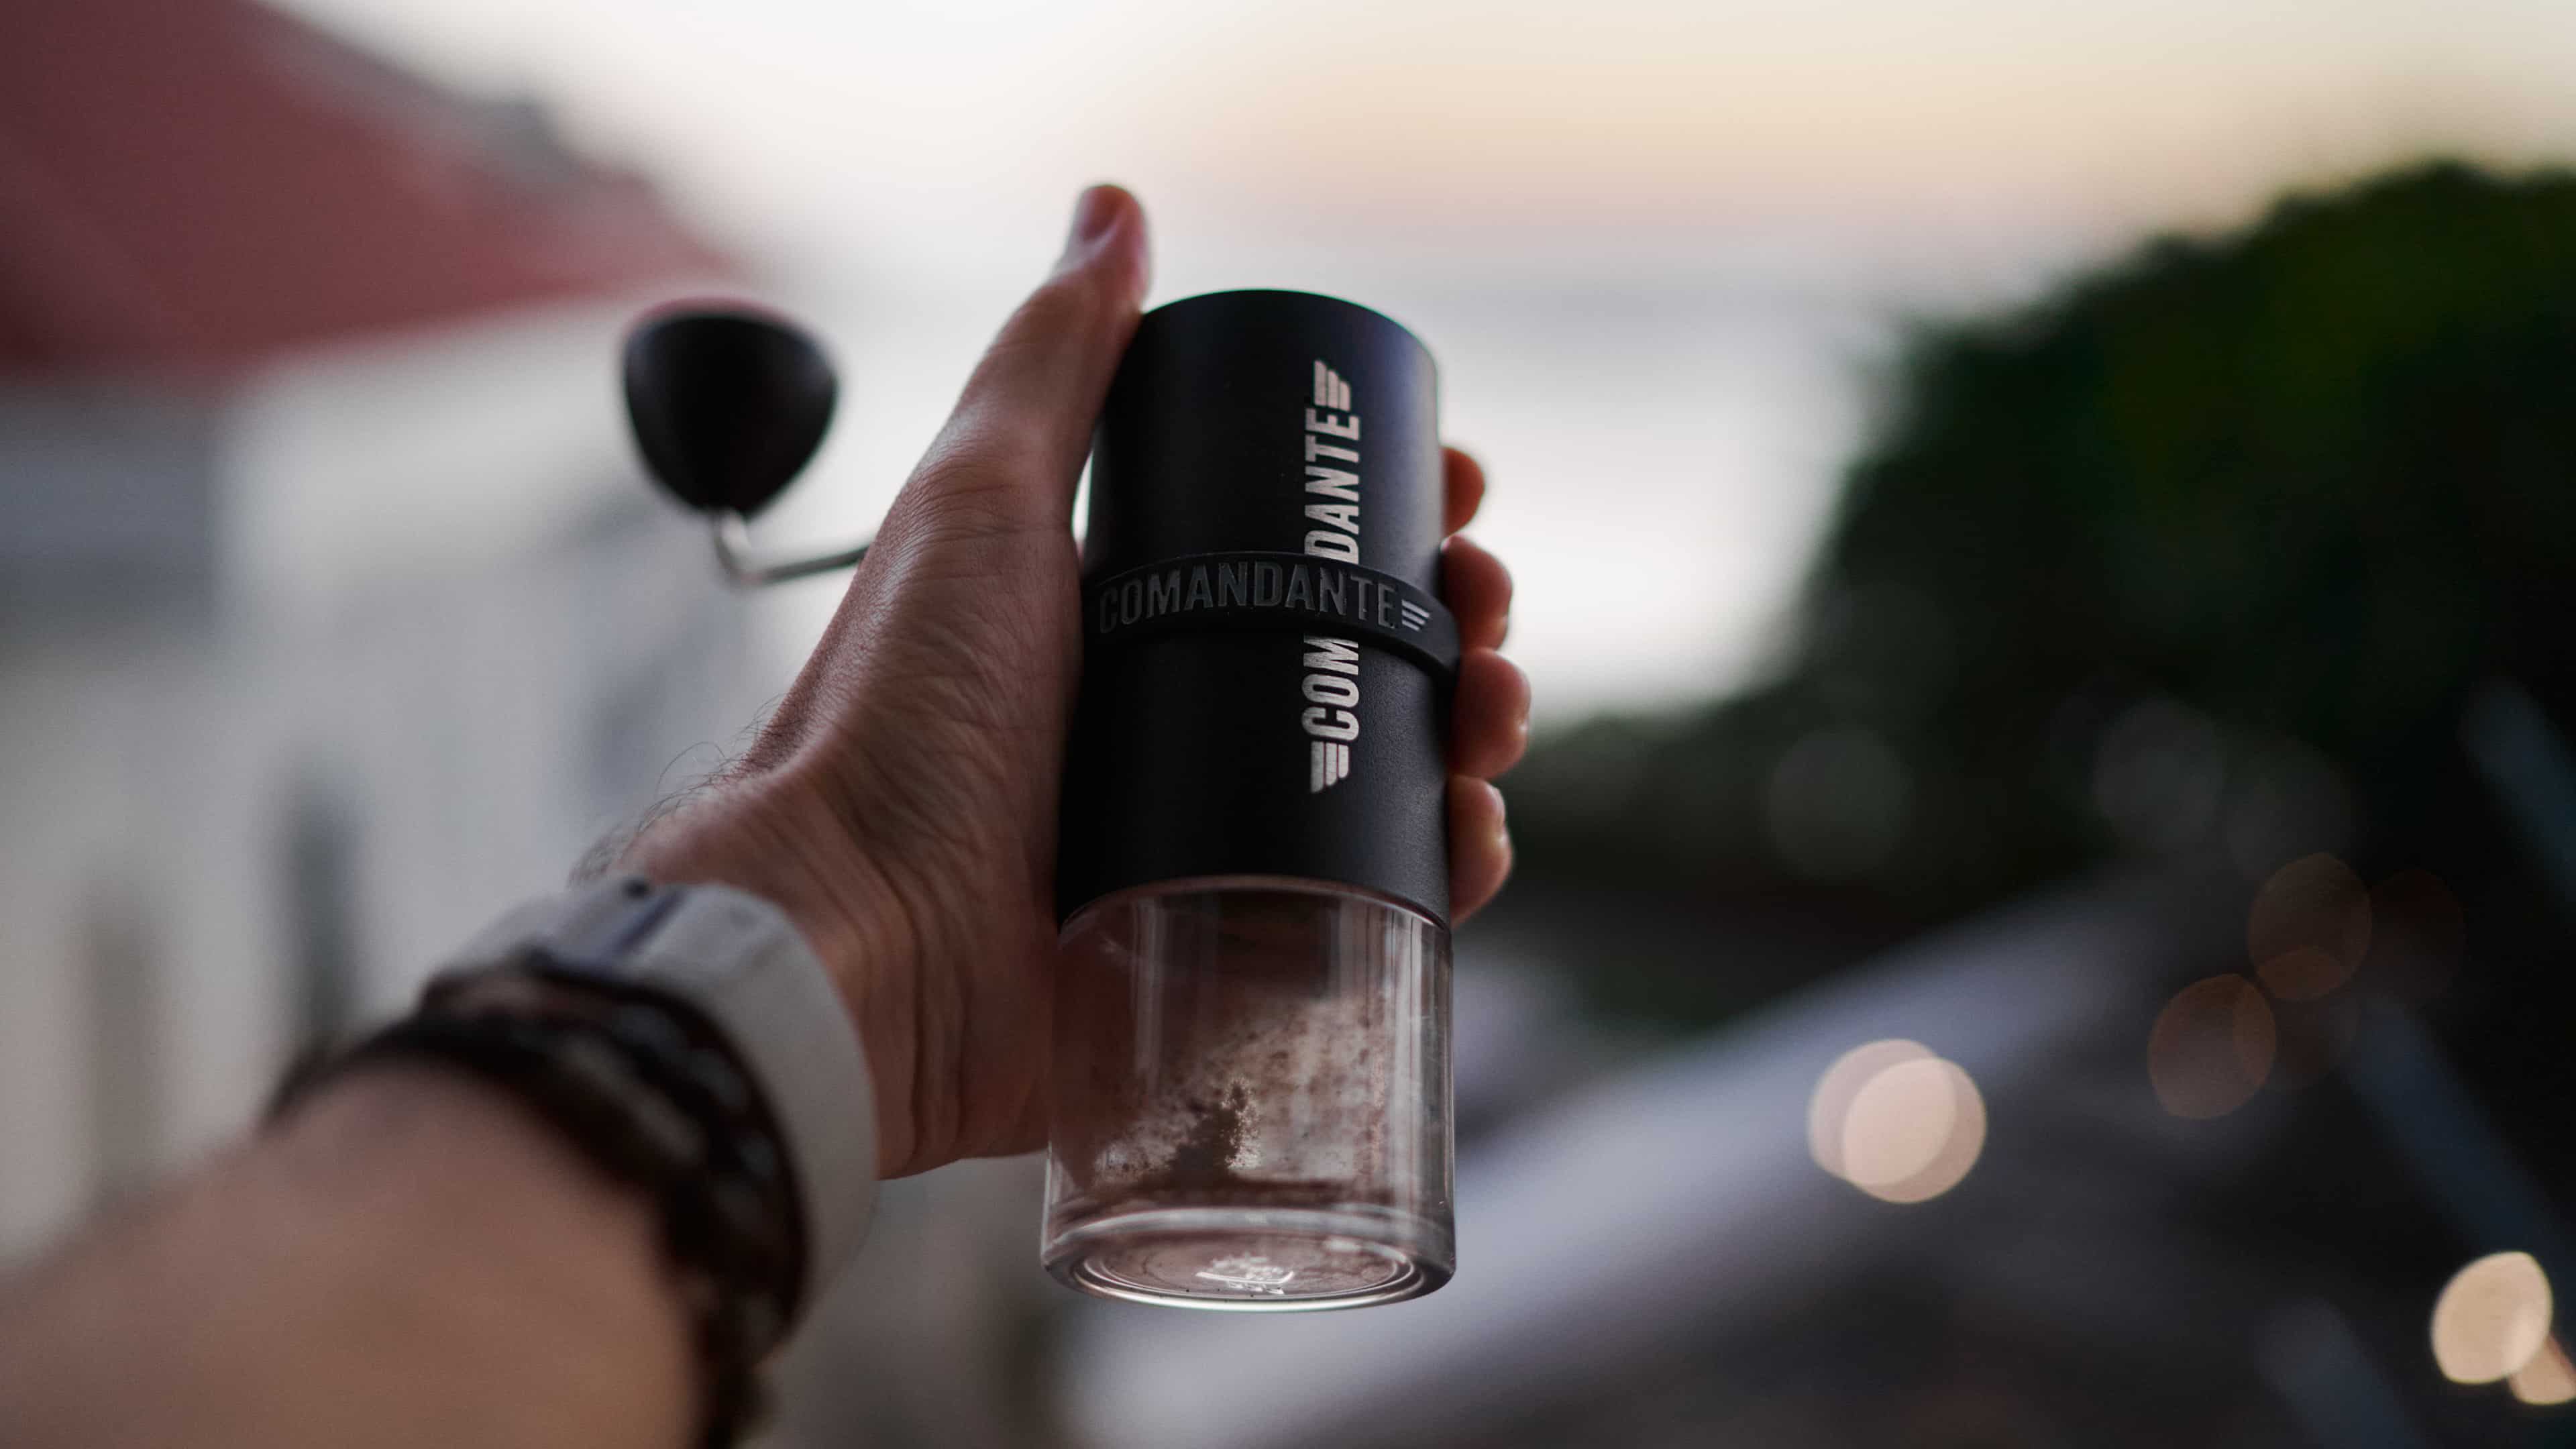
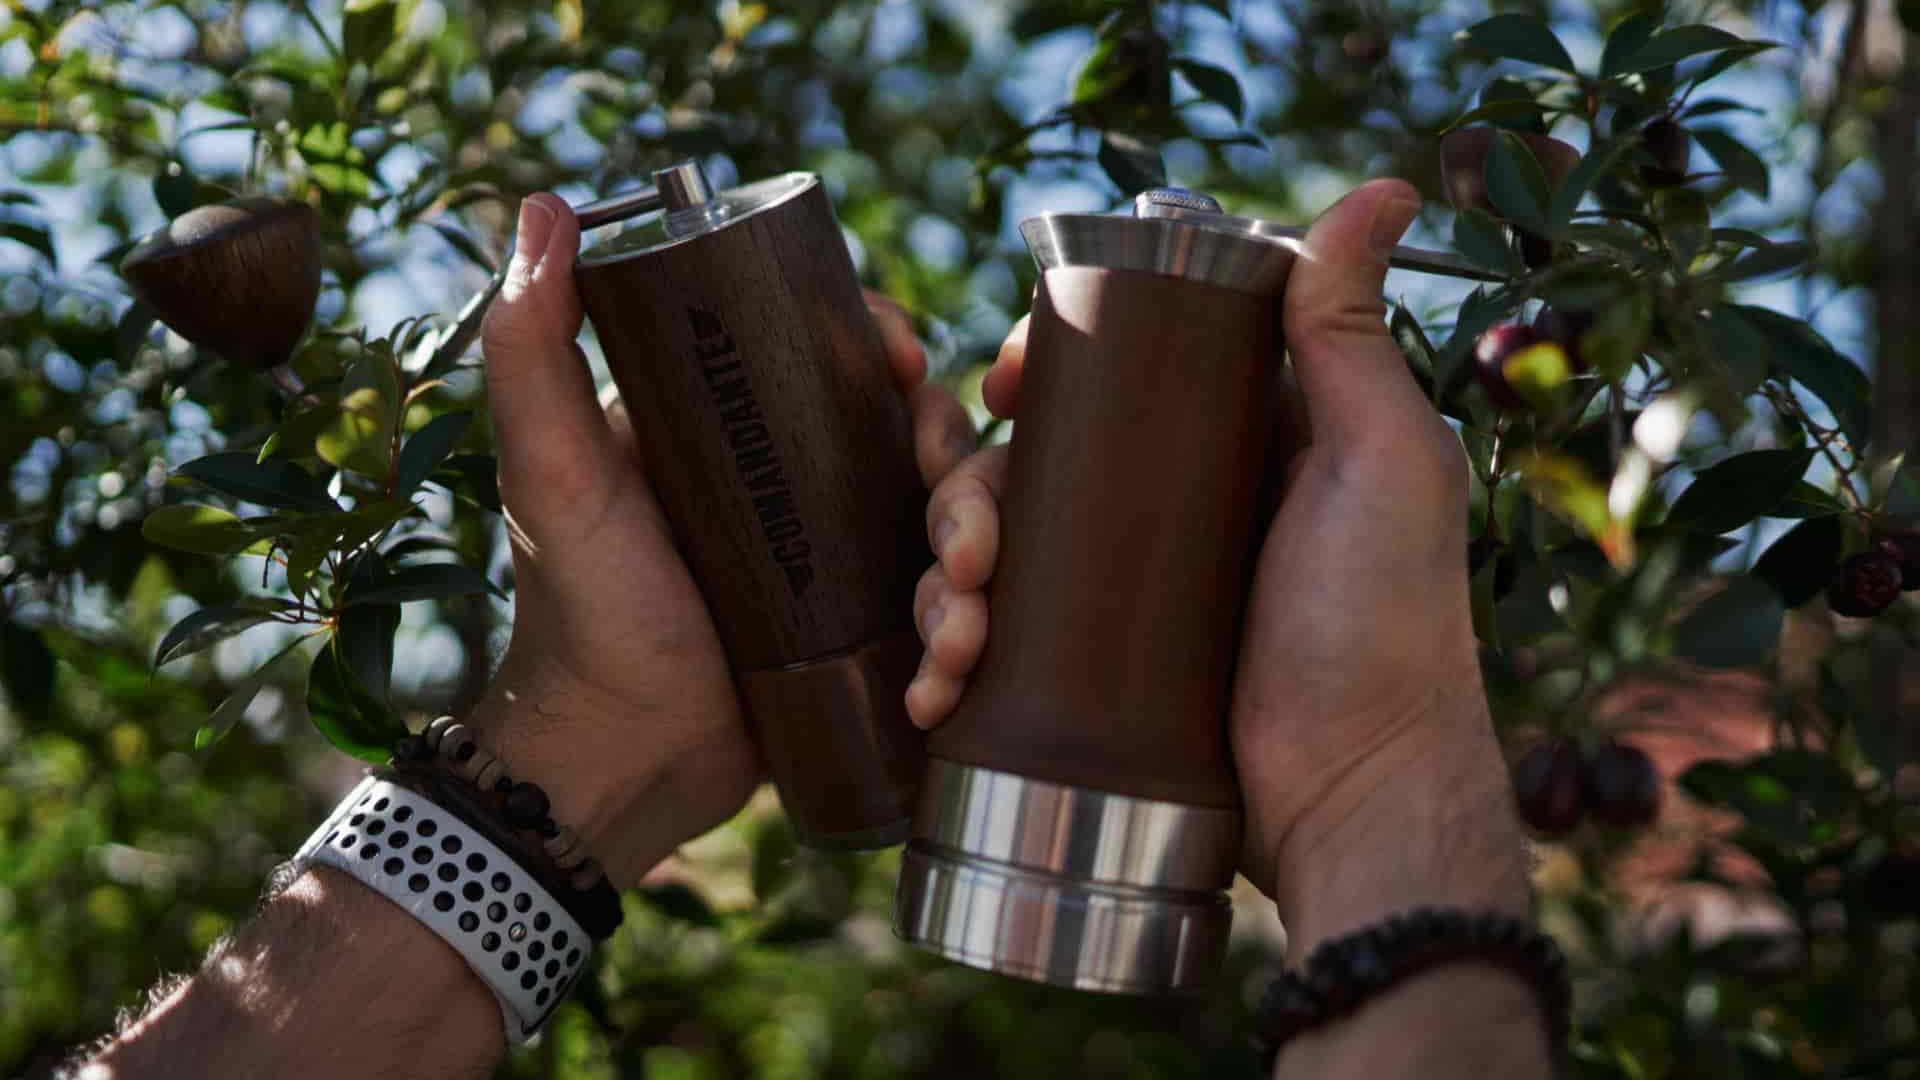
My coffee grinder of choice is the Comandante C40. I have been a Comandante fan ever since I got my very first one back in 2020 and have upgraded to the Mk4 at the end of 2023.
The Comandante allows grinding coffee beans in a wide range of coarseness – from super fine espresso to coarser drip coffee – and more importantly offers a consistent grind. The Mk4 is also fairly efficient, not requiring anywhere near as many rotations and force as their predecessors. And with the transparent jar being made out of plastic rather than glass, the Mk4 has become even more portable with a total weight shy of 600g.
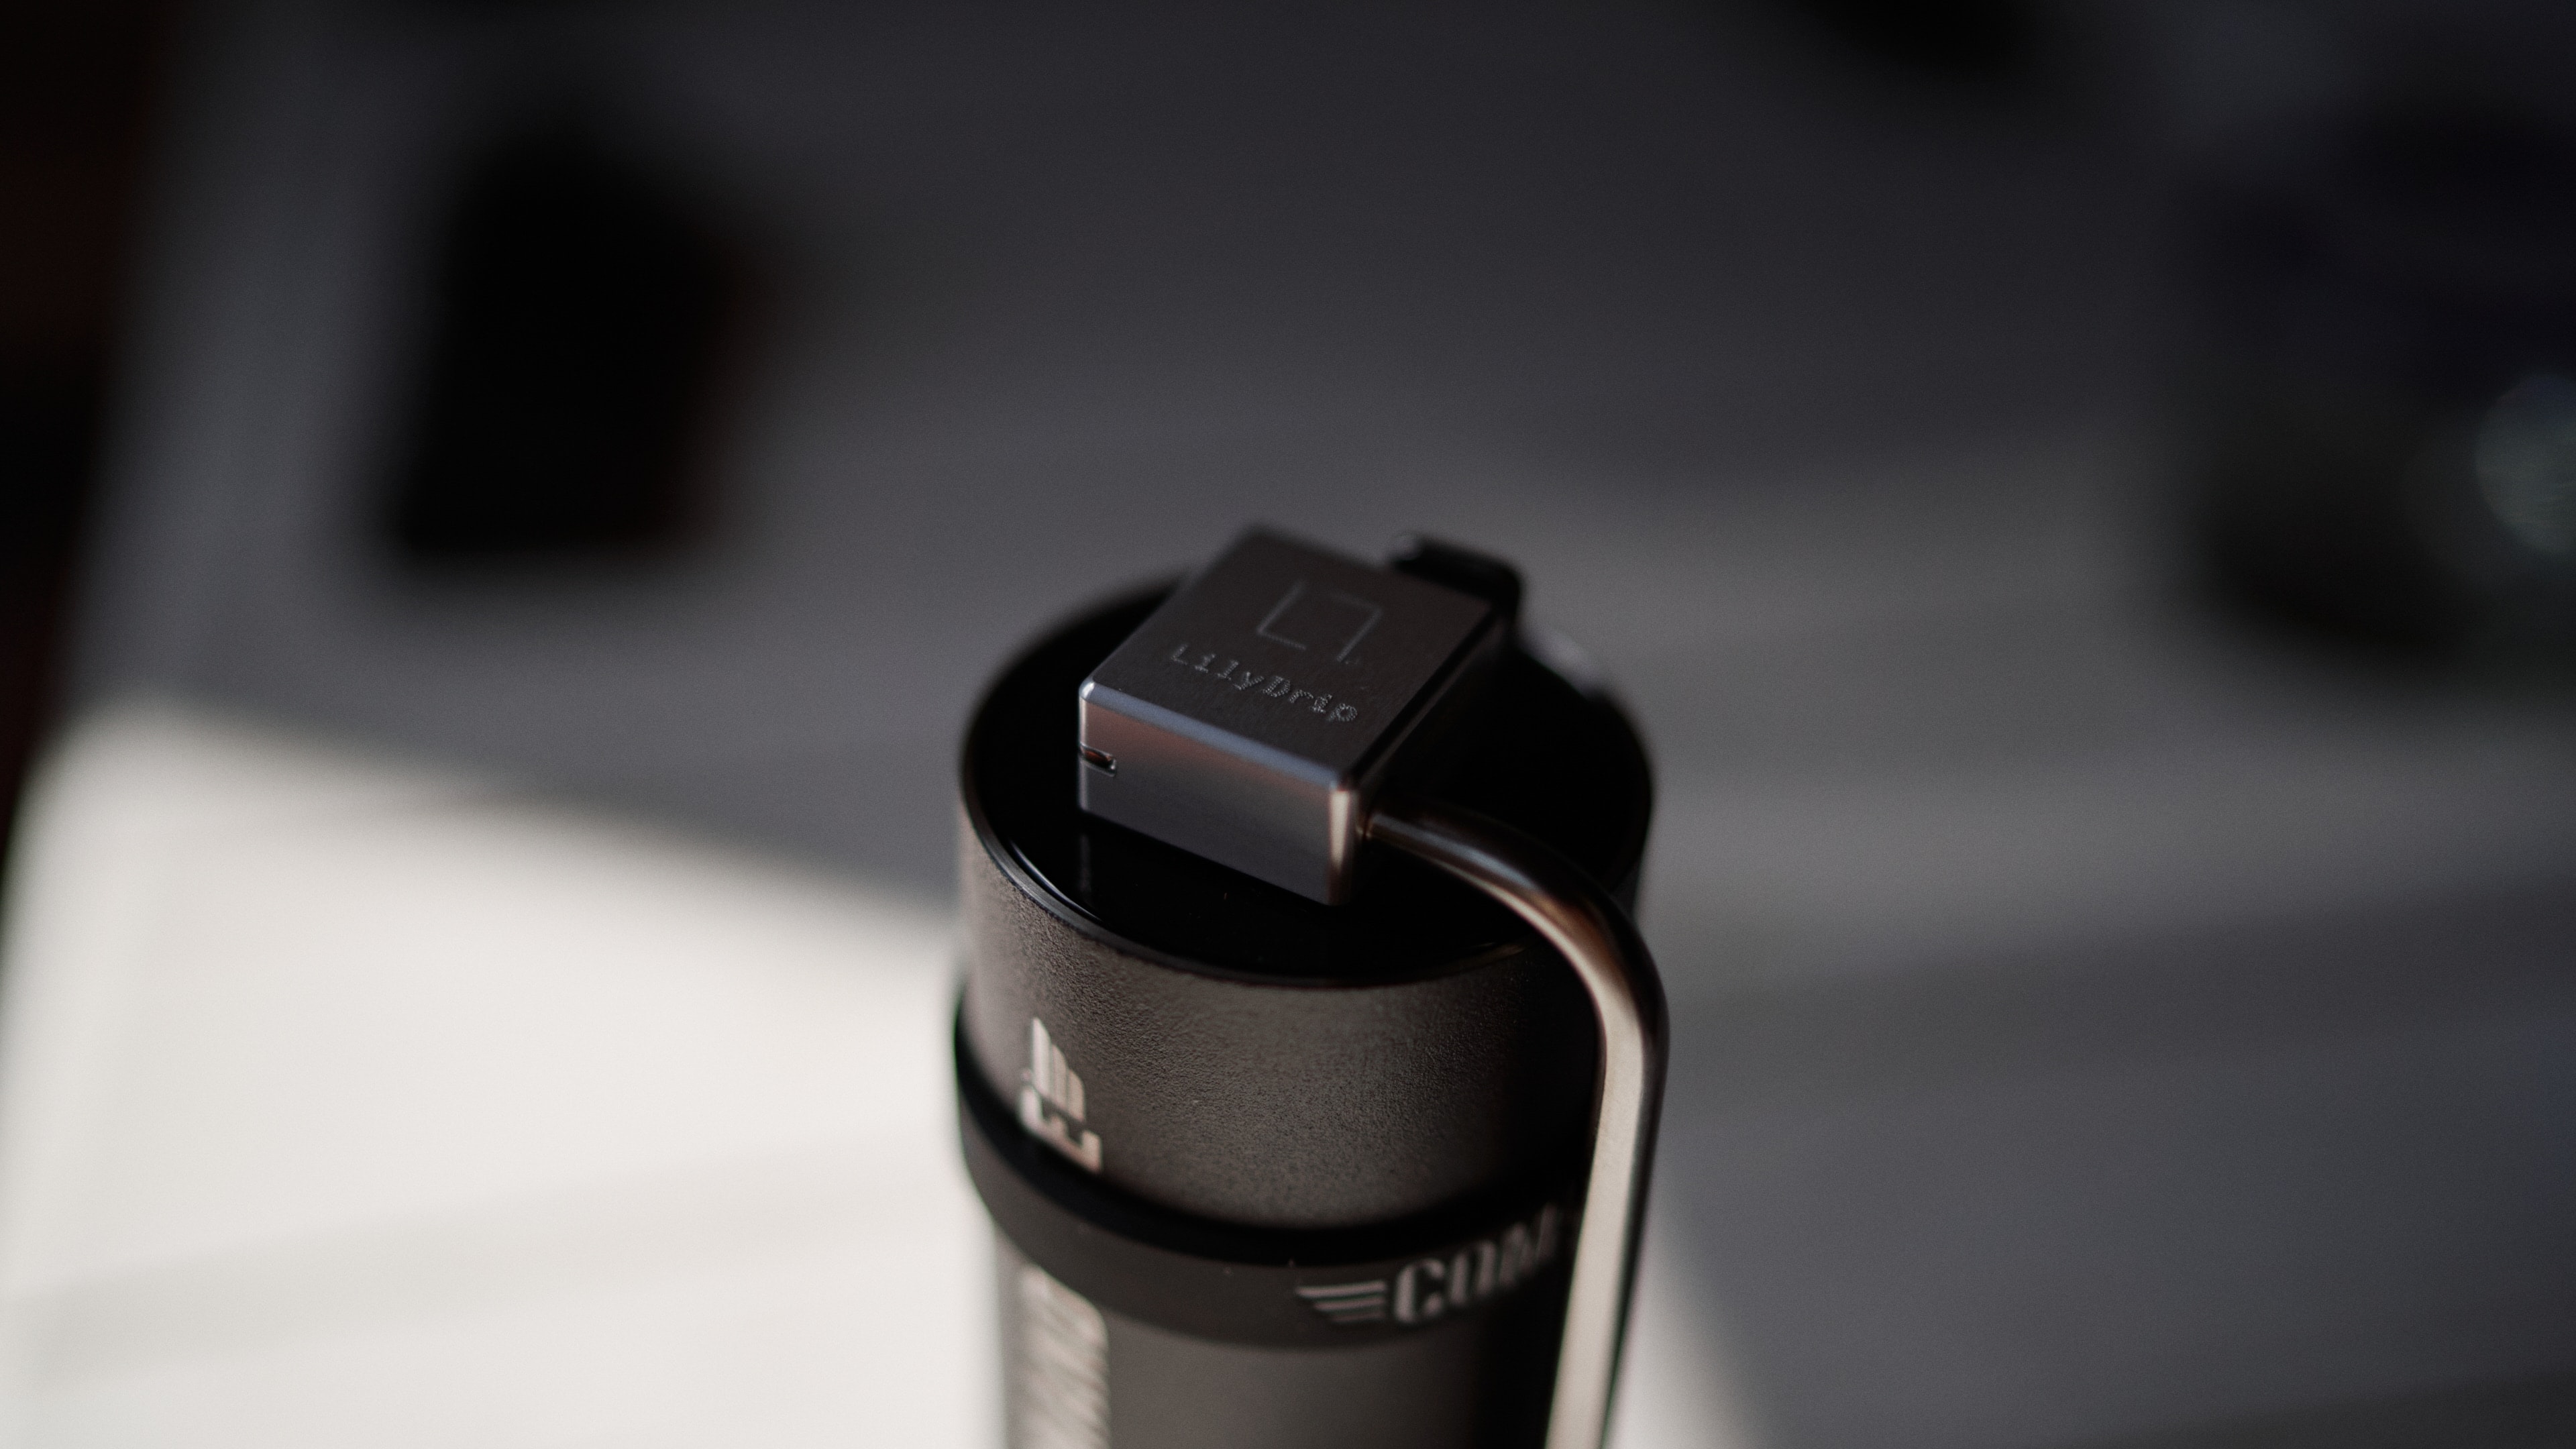
I have a LilyDrip L7c foldable crank that I use on the C40. It allows me to fold down the crank whenever I’m not using the Comandante, making it truly portable and taking away the fear of damaging it on trips. I don’t quite understand why Comandante doesn’t ship a foldable crank by default; The LilyDrip is however definitely worth it. Not only is the crank longer, making it easier to grind, but it also makes the whole device a lot more portable and compact.
Steaming Milk
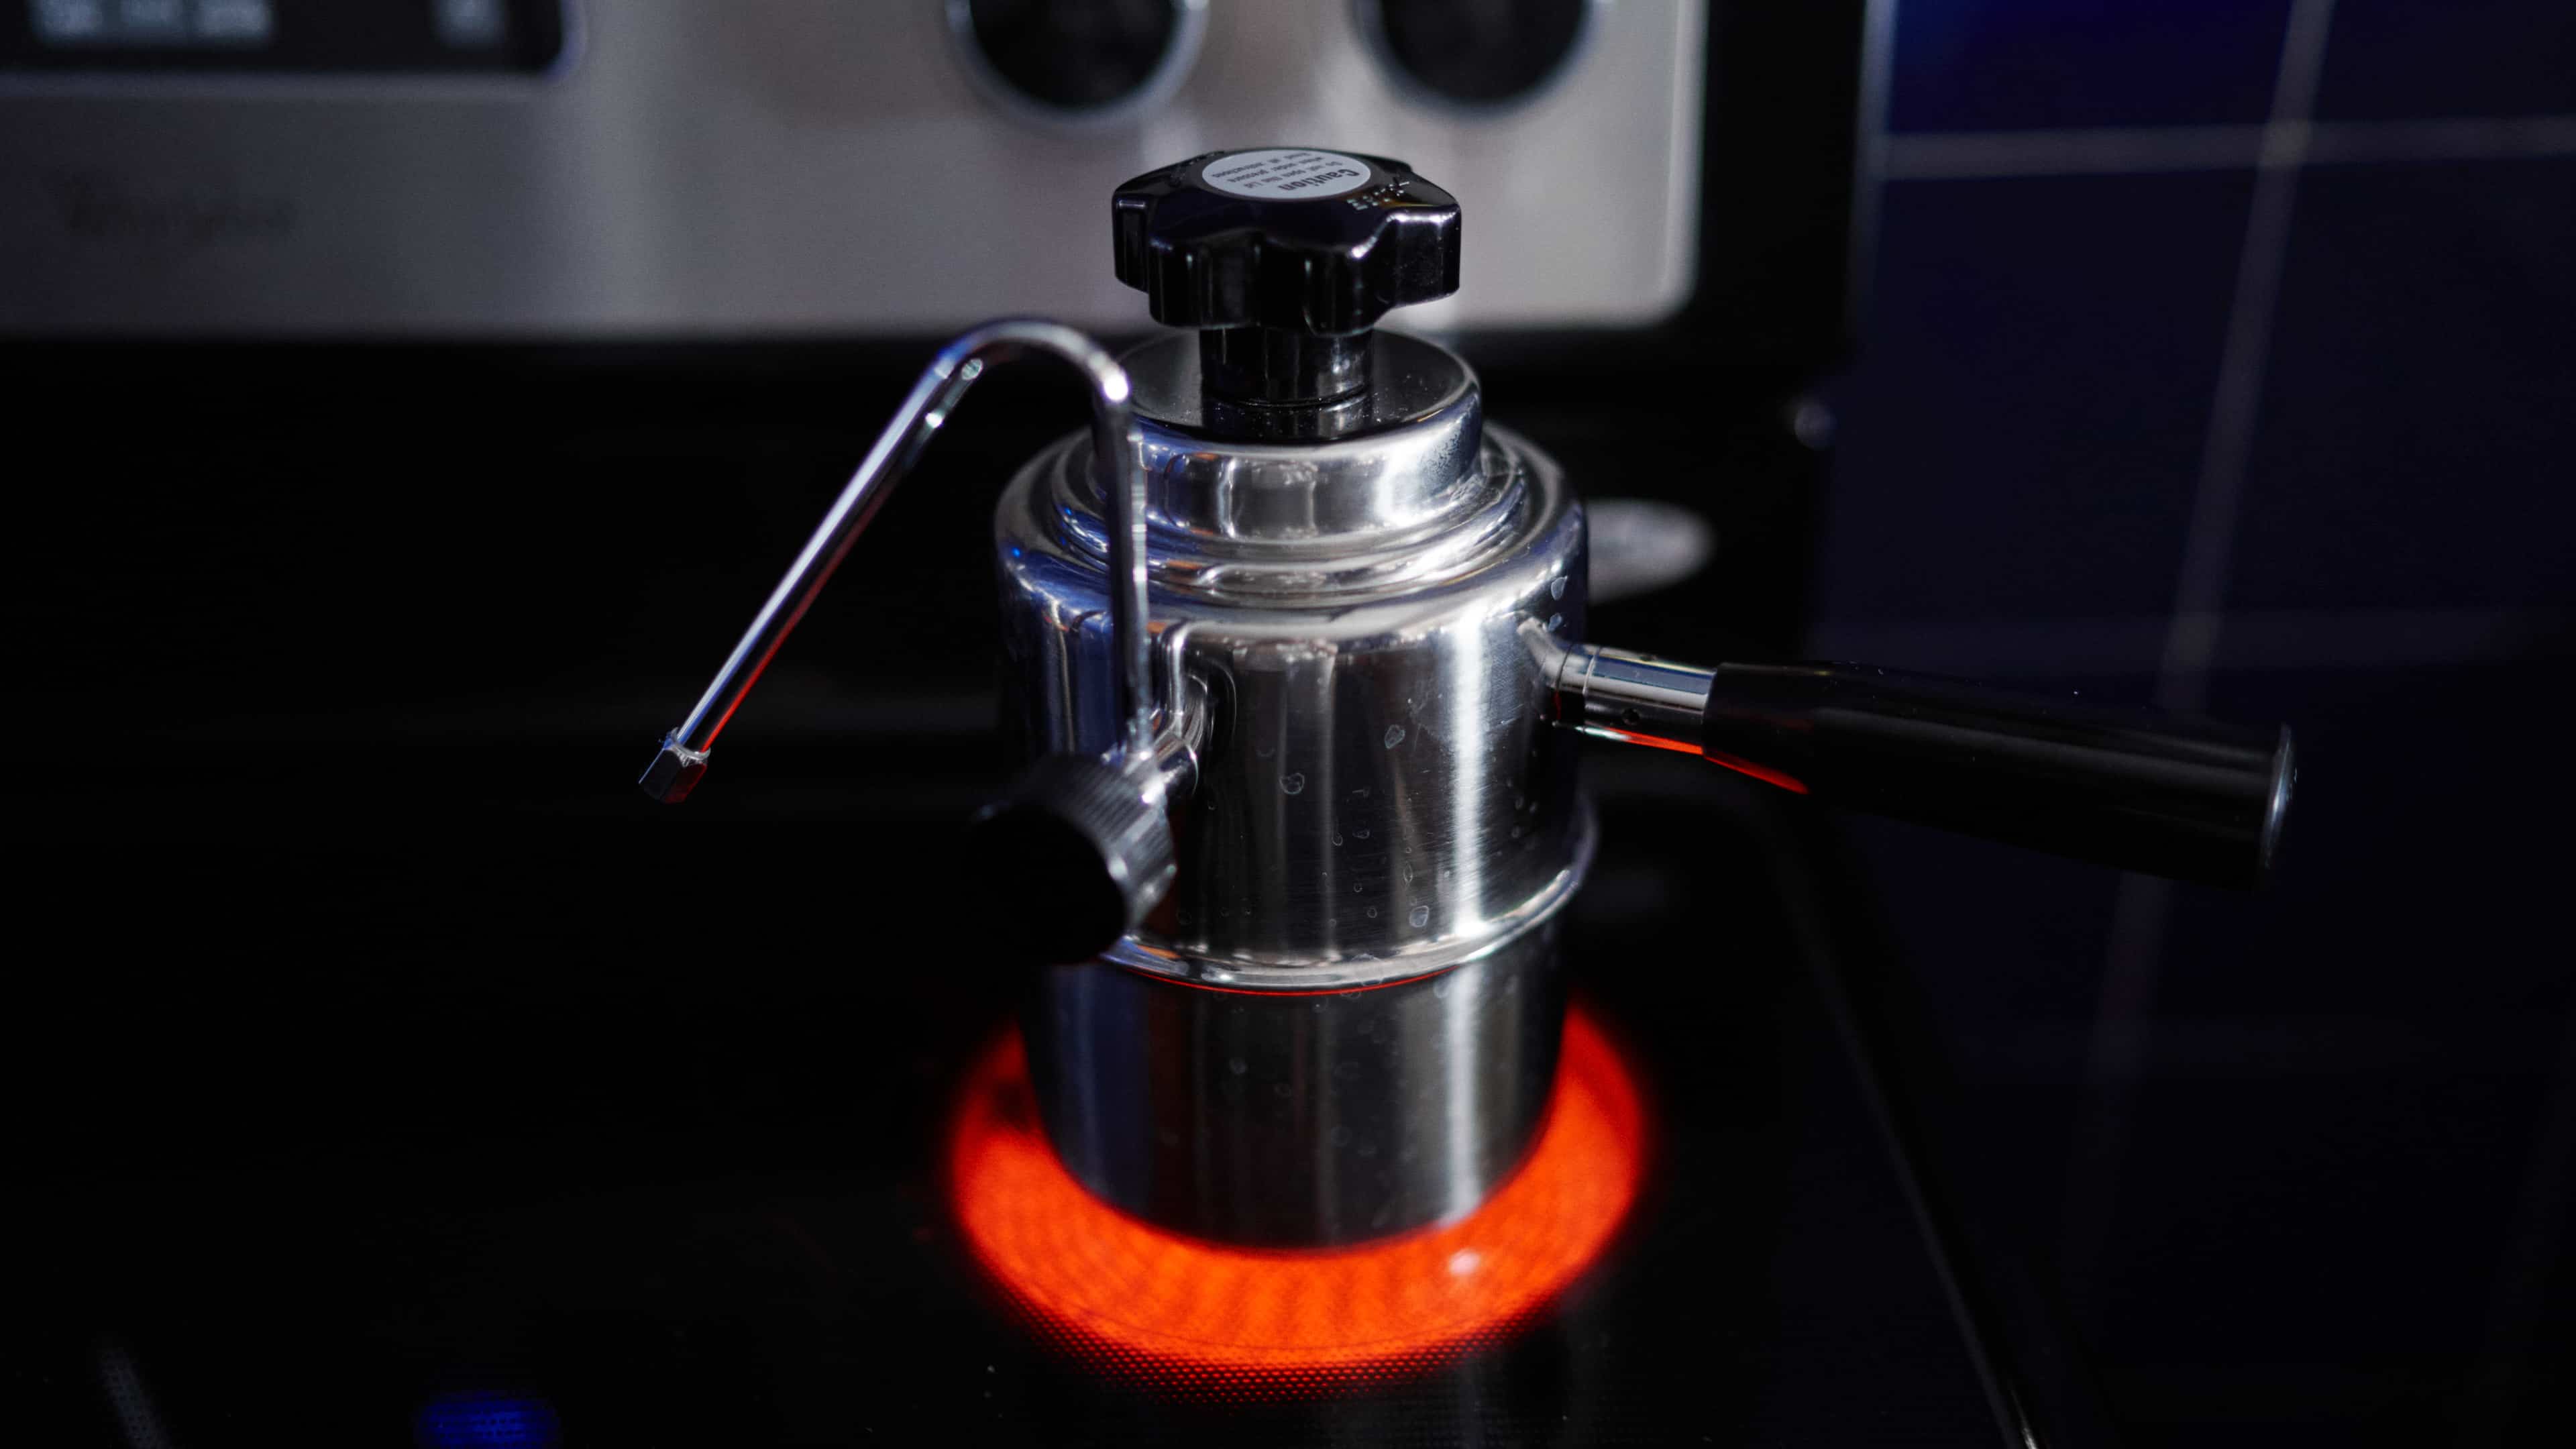
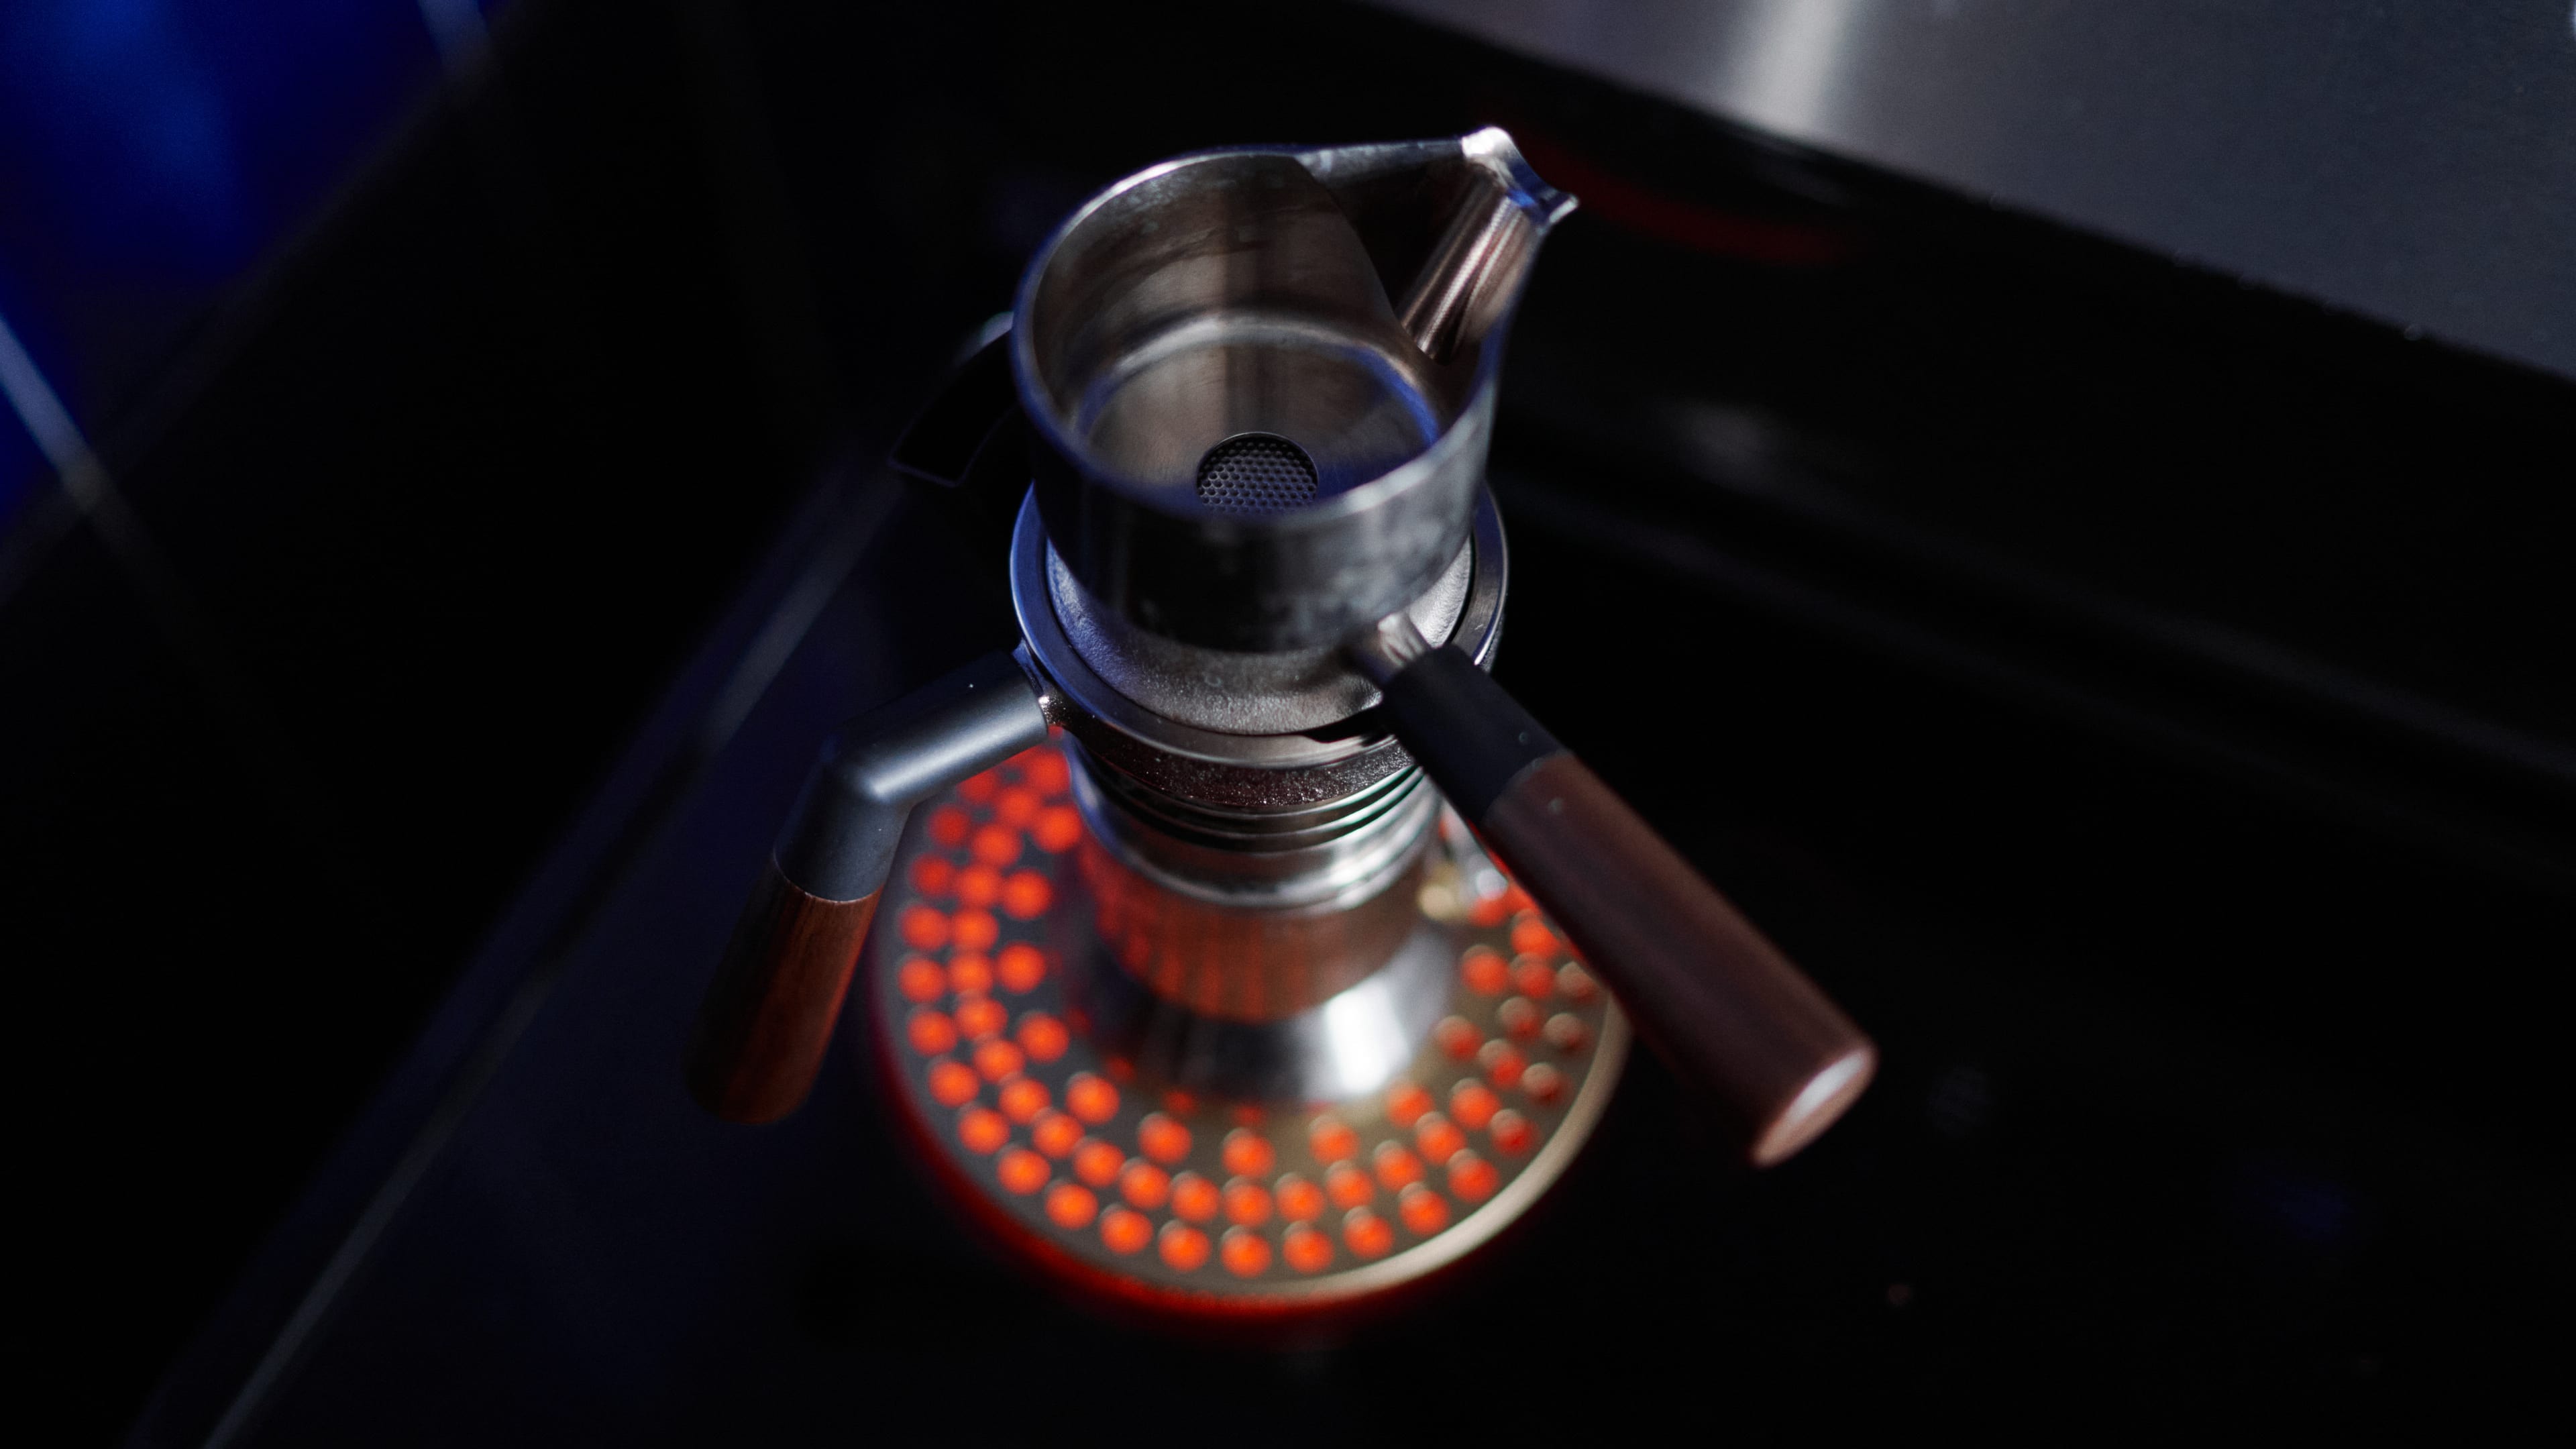
The downside of not having a fully-featured espresso machine is the lack of a steamer. Luckily, there are relatively portable solutions to this problem as well – that do not involve buying an overpriced Nespresso foamer! The Bellman stovetop steamer is one of them.
The steamer is basically a pressure-chamber that is filled halfway up with water and then heated. The pressure and steam that’s building up inside can then be released through the nozzle, making it possible to steam a big jug of milk. It takes approximately ten minutes from start to finish, making this a fairly efficient way to add some latte art to your espresso.
The Bellman has an overpressure valve integrated where the holding handle starts. It’s good that overpressure has been thought of, unfortunately the location is less than ideal, as hot steam might escape from the valve while holding the appliance. In general the handle is a bit too small to comfortably hold the weight of the water-filled boiler. Depending on the heating source, it might also receive some passive heat and sometimes get uncomfortably hot to touch. If you’re using a heat source that is larger than the device itself, it’s best to place it in a way in which the handle does not overreach the rest of the heating element (e.g. the ceramic hob).
Another downside of the handle is the fact that it unscrews relatively often while juggling the boiler around (e.g. cool-down or cleaning) – especially when there is water in the boiler, making it relatively heavy.
When finished using, it’s recommended to open the valve and drain the bottom part of the boiler in cold water, e.g. by running tap water over its bottom part.
Solid Coffee, Hand-Pressed
One of my all-time favorite tools for brewing coffee has always been – and still is – the AeroPress by Alan Adler. While AeroPress, Inc. released a travel variant dubbed the AeroPress Go back in 2019, I still sport the O.G. 2014 model made out of dark brown polypropylene, although I might eventually upgrade to the 2023 AeroPress Clear made out of Tritan.
When I brew with the AeroPress, I prefer the inverted method.
Step 1: Grind coffee beans
We’ll be using 14 grams of coffee and 201 grams of boiling water. You’ll want to use a finer grind than for a regular filter coffee. Depending on the grinder you use the settings may vary and you might need to try-and-error a number of times. Generally speaking, if you have an espresso grind and a filter grind at hand, compare both and try to go in between them, in terms of coarseness.
Step 2: Boil water, prepare AeroPress
Heat 201g of water until it boils and meanwhile prepare the AeroPress. Place the plunger into the AeroPress until it reaches the number 4 and put it upside down (with the open end facing upwards) on a table. Then, add the 14g off ground coffee into it. Prepare the lid by placing a filter into it.
Step 3: Add hot water
First, add a little bit of hot water onto the filter – yes, that’s that 1g – so it sticks on the lid. Then fill up the AeroPress with the remaining 200g of water. Don’t rush it, but also don’t take too long to fill it up. Around 20 to 30 seconds should be fine. After that, wait one minute, give it a quick stir and add the lid. Wait another minute.
Step 4: Flip and press!
Add your cup upside down onto the AeroPress and with it in place, flip the whole contraption and press down the plunger. Don’t press too fast nor take too much time. Around 30 seconds from top to bottom should be good.
Your coffee is ready to be served!
Smooth Brew, Hand-Poured
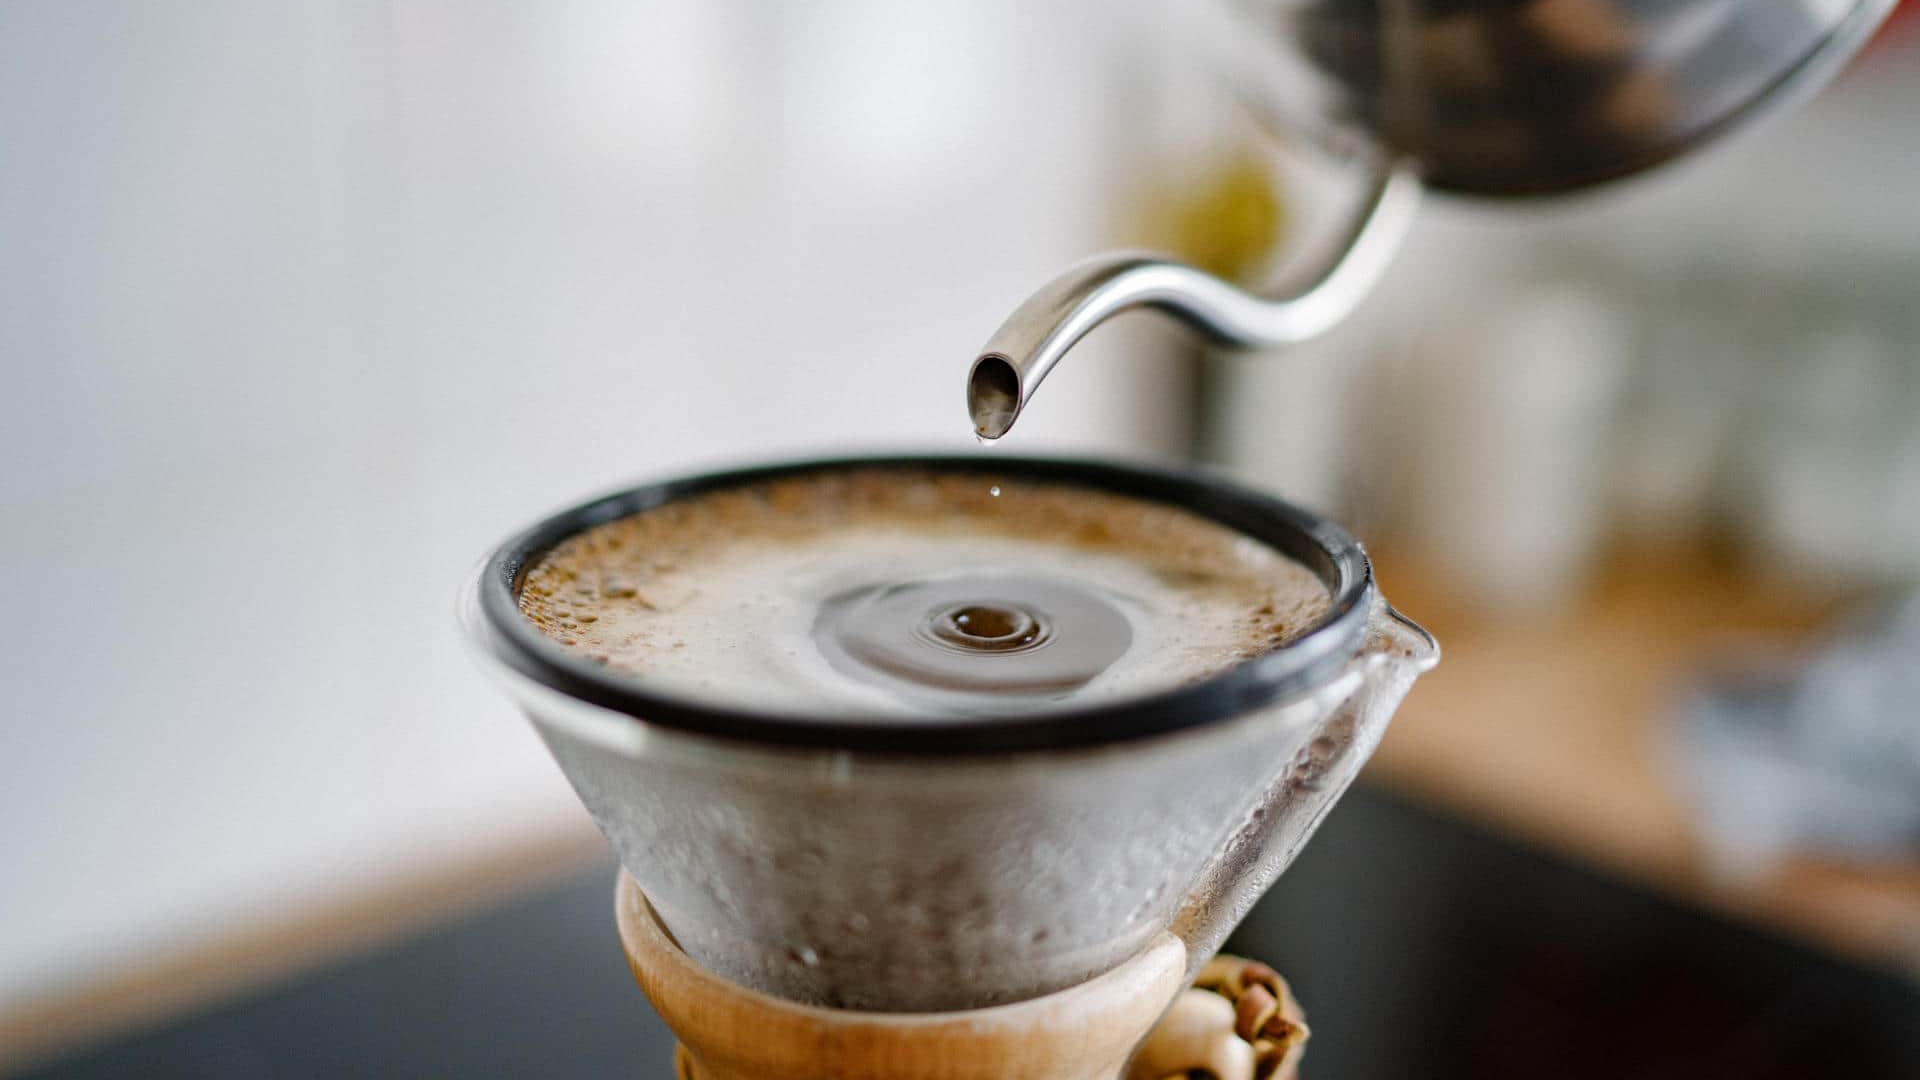
Another good and portable method for brewing coffee is the pour-over. There are a wide variety of tools available, starting with the super portable Hario V60 Plastic Dripper, over the MOMA art piece which is the Chemex Coffeemaker, up to more fancy and fully automated coffee makers like the Ratio Eight.
When I brew pour-over coffee, I prefer using the Able Kone instead of paper filters. The Kone is available for the Chemex as well as the V60 02 coffee dripper.
Step 1: Grind coffee beans, boil water
We’ll need 30g of coarse, sea salt-like ground coffee and 600g of water. Bring the water to a boil while grinding the coffee and adding it into the filter. In case you’ll be using a paper filter you might want to pre-wet it, unless your paper filter brand says otherwise.
Step 2: First pour
Start a timer and begin pouring water slowly, starting in the center, moving in a steady spiral towards the edge and back again. You should be pouring around 60g of water within 15 seconds. Wait 30 seconds after the first pour to allow the coffee to bloom.
Step 3: Second pour
Just like in with the first pour, start in the center and pour water in a steady spiral toward the outer edge and back again. This time we’ll be pouring around 90g of water within roughly 15 seconds. Wait around 50 seconds afterwards.
Step 4: Third pour
After the water from the second pour dropped to the bottom of the filter, pour 100g of water using the same pattern as before, again within roughly 15 seconds. Afterwards wait for another 30 seconds.
Step 5: Fourth pour
For the fourth and final pour add 100g of water within 20 second, again using the same pattern as before. Wait until the coffee stopped dripping.
Your coffee is ready to be served!
While I enjoyed these different hand-brewing variants over extensive periods of time and dialled different knobs – like the bean origin and the roast – to vary the cups of coffee I was getting out of these preparation methods, at the end of the day I kept coming back for a good espresso from my Rancilio Silvia.
I loved the Silvia for being a compact yet powerful espresso machine. Even though it had its shortcomings, like the lack of a pressure gauge or its unstable brewing temperature, I managed to get some decent cups of coffee out of it. The Macap M2D I had standing next to it did a good job at grinding the freshly roasted espresso beans consistently enough so that the Silvia would not only work with the coffee grounds but also produce thick and stable crema along the way.
Unfortunately a full-size espresso machine is not exactly cabin luggage, so I had to give it away one day. Forced to find an alternative, I tested a few options and eventually ended up with what’s now part of my essential travel equipments list:
The Aram Espresso Maker (not
anymore, see below)
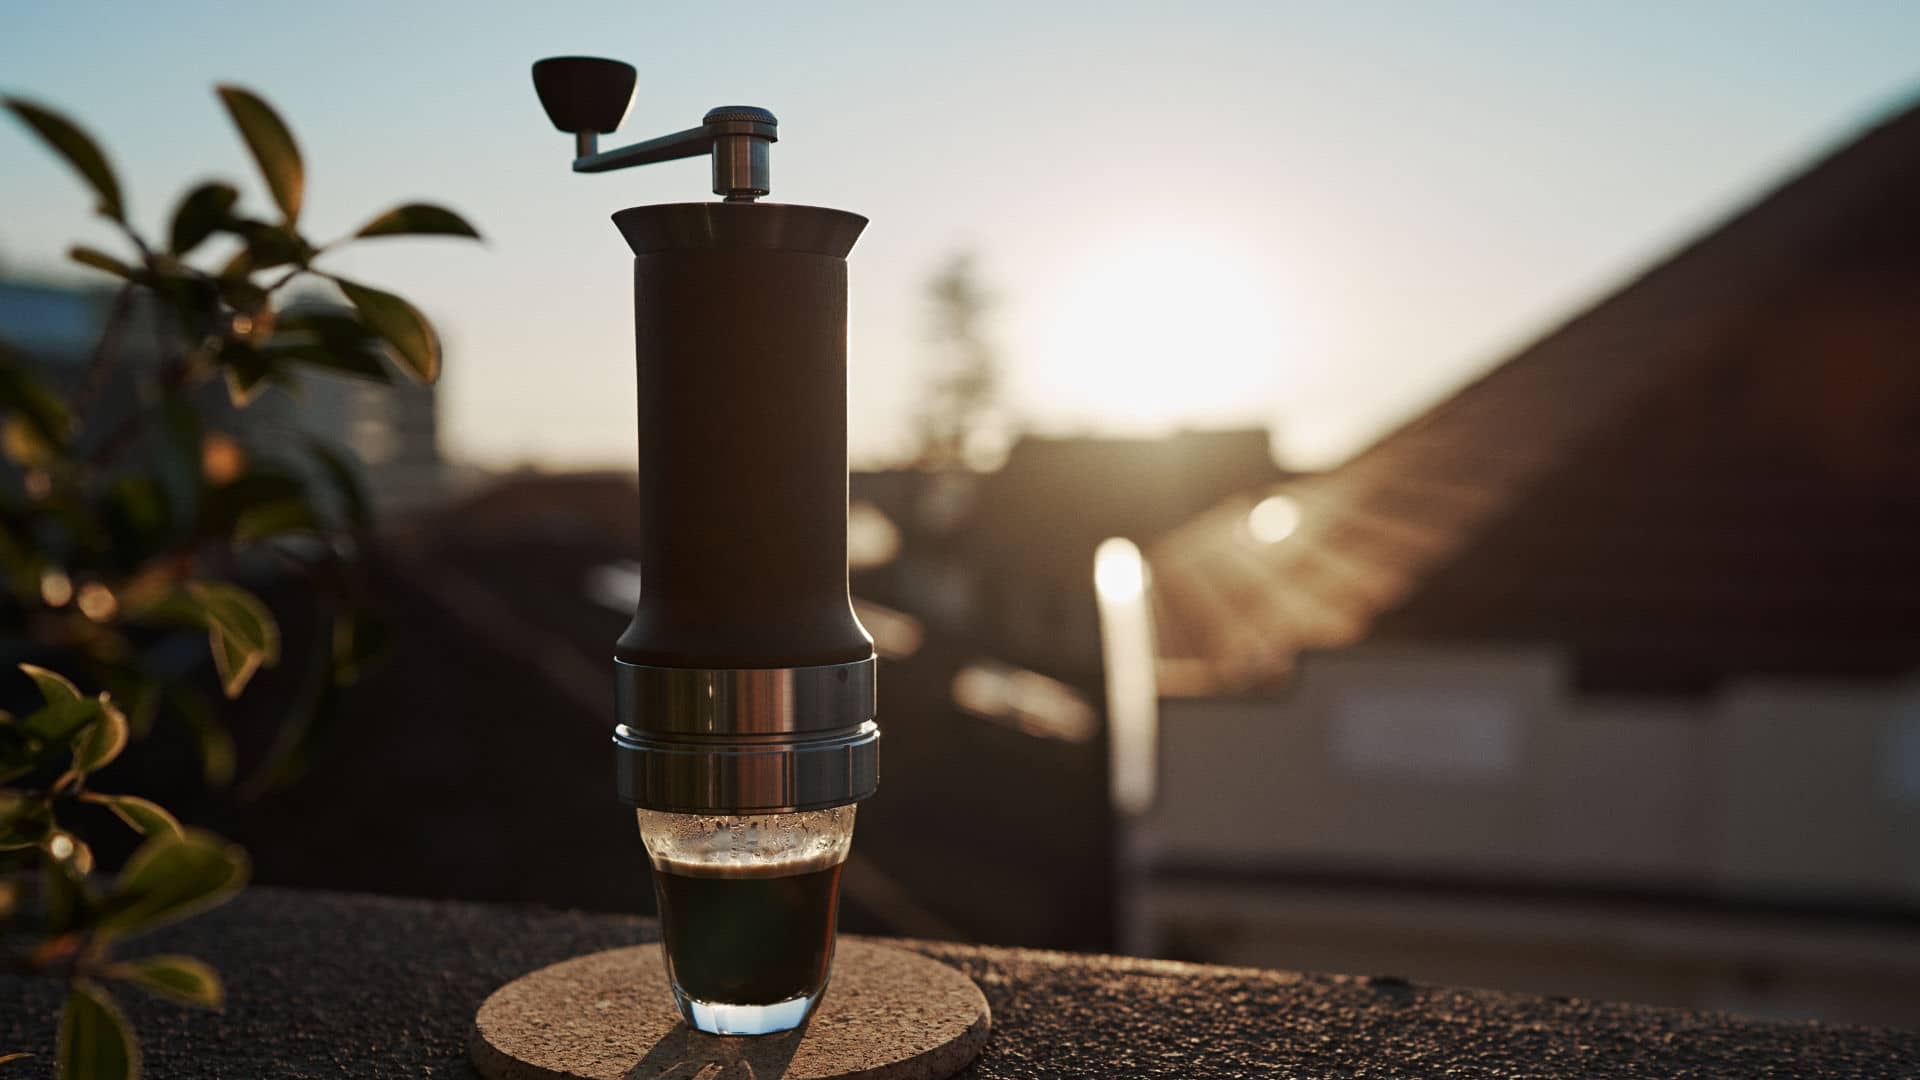
The 9Barista jet engineered espresso machine
The F-16 of Espresso Makers
The 9Barista is a compact powerhouse that brings the art of espresso making to your fingertips. With its innovative design, the 9Barista redefines home brewing, offering a professional-grade espresso experience in a sleek and more importantly portable package. With its 18cms in height and 1.7kg in weight, the 9Barista is the perfect travel companion for everyone who enjoys awesome espresso on the go.
Crafted with attention to detail, this espresso machine is built around the principle of achieving the optimal 9 bars of pressure – the golden standard for extracting the perfect shot of espresso – and can produce real espresso on a stovetop. How? By using the same principles as those found in jet engines; high pressures, perfectly controlled temperatures and precise engineering to bring it all together.
Step 1: Grind coffee beans
The first thing you’ll need to get a good cup of espresso from the 9Barista is a handful of good quality roasted beans of your liking and a good grinder. To make it clear upfront: The 9Barista won’t deliver great results with most pre-ground coffee (e.g. from supermarkets or maybe even from your non-speciality local coffee shop) as like with every espresso maker it is a bit pretentious in terms of grind coarseness. You will definitely need a decent grinder that will allow you to fine-tune the grind level, otherwise you won’t be getting anything close to a good espresso out of it.
I use a Comandante C40 Mk4 hand grinder. I tried cheaper hand grinders (like the Hario Mini Slim) with the but couldn’t get a satisfiable result with those grinds. Even with the Comandante it took me a few cups until I got the shot on point.
As for the amount, I would suggest going between 14g and 19g, depending on the type of roast and your own taste. I use a scale to get the right amount.
Step 2: Prepare the engine
Next it’s time to prepare the engine by filing up cold water until the marker ring of the high pressure boiler (bottom piece), then screw the middle piece, that contains the coil heat exchanger, the water cooling boiler, the spring loaded valve and the fin heat exchanger on top and afterwards fill the basket with 14g to 19g of finely ground coffee. Put the basket into the holder and don’t forget to add the rubber basket cap before flipping the holder. Make sure to screw all three piece tightly together.
Step 3: Fire up the engine
Put the 9Barista onto the stovetop (or a similar heat source) – ideally using the heat transfer plate, or the induction adaptor plate in case of an induction stovetop – and fire it up. The tricky part is regulating the heat in a way in which the boiler is heated to 179°C, which increases the pressure inside to 9 bar. At that point, a spring-loaded valve opens, which allows for water to flow from the high-pressure boiler into the coil heat exchanger, where it is cooled down to 100°C while still maintaining pressure. When the water passes through the last step – the fin heat exchanger – it is cooled further down to 93°C, at which point it has the right temperature to pass through the ground coffee and extract a perfect shot of espresso. All within roughly 4 minutes, with the actual shot pouring out at the end within roughly 27 seconds. If the heat is too high, the water will evaporate too quickly, resulting in the 9Barista running dry and eventually damaging the components. If the temperature is too low, the required pressure won’t be reached.
Temperature regulation depends a lot on the heat source, hence it is hard to give general advice. However, it’s a good idea to start with high heat until the water becomes audible, at which point the heat source can be turned down to medium-high heat. In case the 9Barista starts spitting out significant amounts of hot water through its outlet it’s probably running a little too hot and heat should be reduced.
Beautiful Espresso, No Electricity Required
The Aram Espresso Maker (or Coffee Maker, how it was still called when I got mine) is a minimalist, high quality tool for extracting genuine espresso using a fully manual process. To do so, ground coffee and some boiling water is required.
Update March ‘21: My Aram has been out of order since the beginning of 2021 due to a broken gasket. I have learned that when something on the Aram should break - like for example the gasket on mine - it will be a lot of trouble to get replacement parts to fix it, especially during these times. Unless you have a distributor around that has all replacement parts available, the Aram might not be the best tool to rely on.
There aren’t many parts that can break on this device, but if even a single of of them does you’re basically screwed and have to wait for Aram to have the part in stock as well as be able to receive it.
I’m not even mad about Aram not being able to offer a quicker way to get replacements, but what I’m disappointed about is that they didn’t throw a couple of fragile parts, that are likely to experience wear and tear over time, into the initial purchase – especially at the price of ~$500. These parts cost basically nothing in bulk and would save customers’ nerves when they fail.
Update September ‘21: It turns out that other gaskets have also deteriorated and broke. I’m yet on the hunt for replacement parts. Communication with Aram has become tedious, because it takes ages for them to get back and even when they do, misunderstandings seem to happen. I’ve tried finding the broken parts at hardware stores nearby, but haven’t had any success so far.
Update January ‘22: It has been almost a year since I had to put the Aram out of service due to broken gaskets. Communication with Aram is bad. At some point they simply stopped responding. I was trying to order (and pay for) the replacement gaskets from them, but it seems like helping out their customers is not their top priority. Eventually I found an online hardware store that’s located somewhere in Europe, that had gaskets that are similar to the ones used by Aram. I gave it a shot, ordered them and was able to fix my Aram just recently.
The gaskets don’t fit 100% though. While the Aram works and the pressure seems fine, I’m very disappointed by Aram’s lack of support. It’s possible to fix the Espresso Maker using third party components, although it’s less than ideal, especially at the price at which Aram positioned their device. It feels like fixing a Ferrari by using scrapped components from an old Fiat - it’s certainly possible but definitely not the experience you’d expect.
Update September ‘22: The plastic piece that would hold the crank broke and the device began losing pressure. Trying to resume communication with Aram once again to get hold of replacement parts.
Update December ‘23: I gave up and gave away the Aram.
Step 1: Grind coffee beans
As with other methods, to get a good cup of espresso from the Aram you will need good quality roasted beans of your liking and a good grinder. As mentioned for the 9Barista, making espresso won’t work with most pre-ground coffee with the Aram either. You will need a decent grinder that will allow you to fine-tune the grind level, otherwise you won’t be getting anything close to a good espresso out of it.
As for the amount, I would suggest going with approximately 19g. I used to use a scale for getting the right amount, but eventually I got the feeling for it and could spare an expensive scale. I found that as soon as I dialled the grinder to a good setting, small variations in the amount are totally okay and in fact produce interesting taste profiles.
Step 2: Boil water and preheat
Preheating is key to success with the Aram. It’s a chunk of 304 stainless steel that absorbs an incredible amount of heat, hence it requires a few rounds of how water running through it before the actual brew can happen. I usually boil the water, pour it into the Aram (with its valve fully closed) and let it sit for two to three minutes, while I keep the rest of the hot water at a near-boiling temperature. Then I turn the crank to open the valve and let the water run back into the pot/boiler/kettle, where I make it boil just to pour it back into the Aram and let it stay for a bit again.
I repeat this two to three times, until I can feel that the Aram’s exterior got close to being uncomfortably warm. You could stick a thin thermometer through the holes on the top to measure how the water temperature changes, but, duh, nerd.
Hint: Don’t use tap water unless you know the mineral content of it. As I’ve detailed previously (search for TDS), not all water is the same, hence the resulting cup of coffee will taste differently depending on the water that you use. I usually prefer bottled water for which I can look up its mineral content, to make sure it is in the acceptable range for espresso.
Step 3: Pull the shot
As soon as I drained the chamber, I use a cloth to dry the bottom part and attach the filter containing the tampered coffee and connect the glass underneath. Then I pour the boiling water into it and turn the crank as quickly as possible until the screw thread reached its upper end. After that I quickly turn the crank the other way around until I can feel the pressure building up, which is when I start slowing down. At that point the espresso starts flowing and becomes brighter and brighter with every turn.
I usually stop the extraction as soon as I got the desired amount of coffee in the cup. This is done by spinning the crank back up until you hear a slurping sound, which is when the negative pressure kicks in, stopping the coffee from flowing. The glass can then be removed safely and the rest of the water inside the chamber can be drained afterwards.
Coffee beans
In addition to the tools that I use and the actual espresso brewing process, I’m also beginning to maintain this list of some of the coffee beans that I’ve had so far. This list will grow over time and I will try to look up older roasts and add them as well.
These are all espresso roasts. The rating is my personal rating for the individual roasts. Keep in mind that coffee is seasonal and hence not constant in availability nor flavour.
| Roaster | Name | Origin | Altitude | Flavours | Info | Date | Rating |
|---|---|---|---|---|---|---|---|
| Five Elephant | La Dulce Memoria | Guatemala | 1800m | Nougat, chocolate | Finca La Dulce Memoria | 28.11.2016 | ✪✪ |
| TODO | 2017 | ||||||
| TODO | 2018 | ||||||
| TODO | 2019 | ||||||
| Roeststaette Berlin | Sinfonia | Brazil, Peru | 1100m, ####m | Milkchocolate, hazelnut | Part from Farm Fazenda Santiago in Patos de Minas; Part from Cedros Cafe Cooperative in Cajamarca | 07.08.2020 | ✪ |
| The Barn | Bosques de San Francisco | Guatemala | 1600m | Chocolate, Almond | Finca Filadelfia in Antigua, varietal: Caturra, Bourbon | 07.08.2020 | ✪ |
| Square Mile | Todos Santos | Guatemala | 1750m | Cherry, dark chocolate, blueberry | A washed process Caturra variety produced by various smallholders in the Huehuetenango region | 01.10.2020 | ✪ |
| Square Mile | La Cuesta | Costa Rica | 1750m | Dried fig, chocolate, hazelnut | A white honey processed mix of Caturra & Catuai varieties produced by Marco Tulio Naranjo in Tarrazú region | 02.10.2020 | ✪✪ |
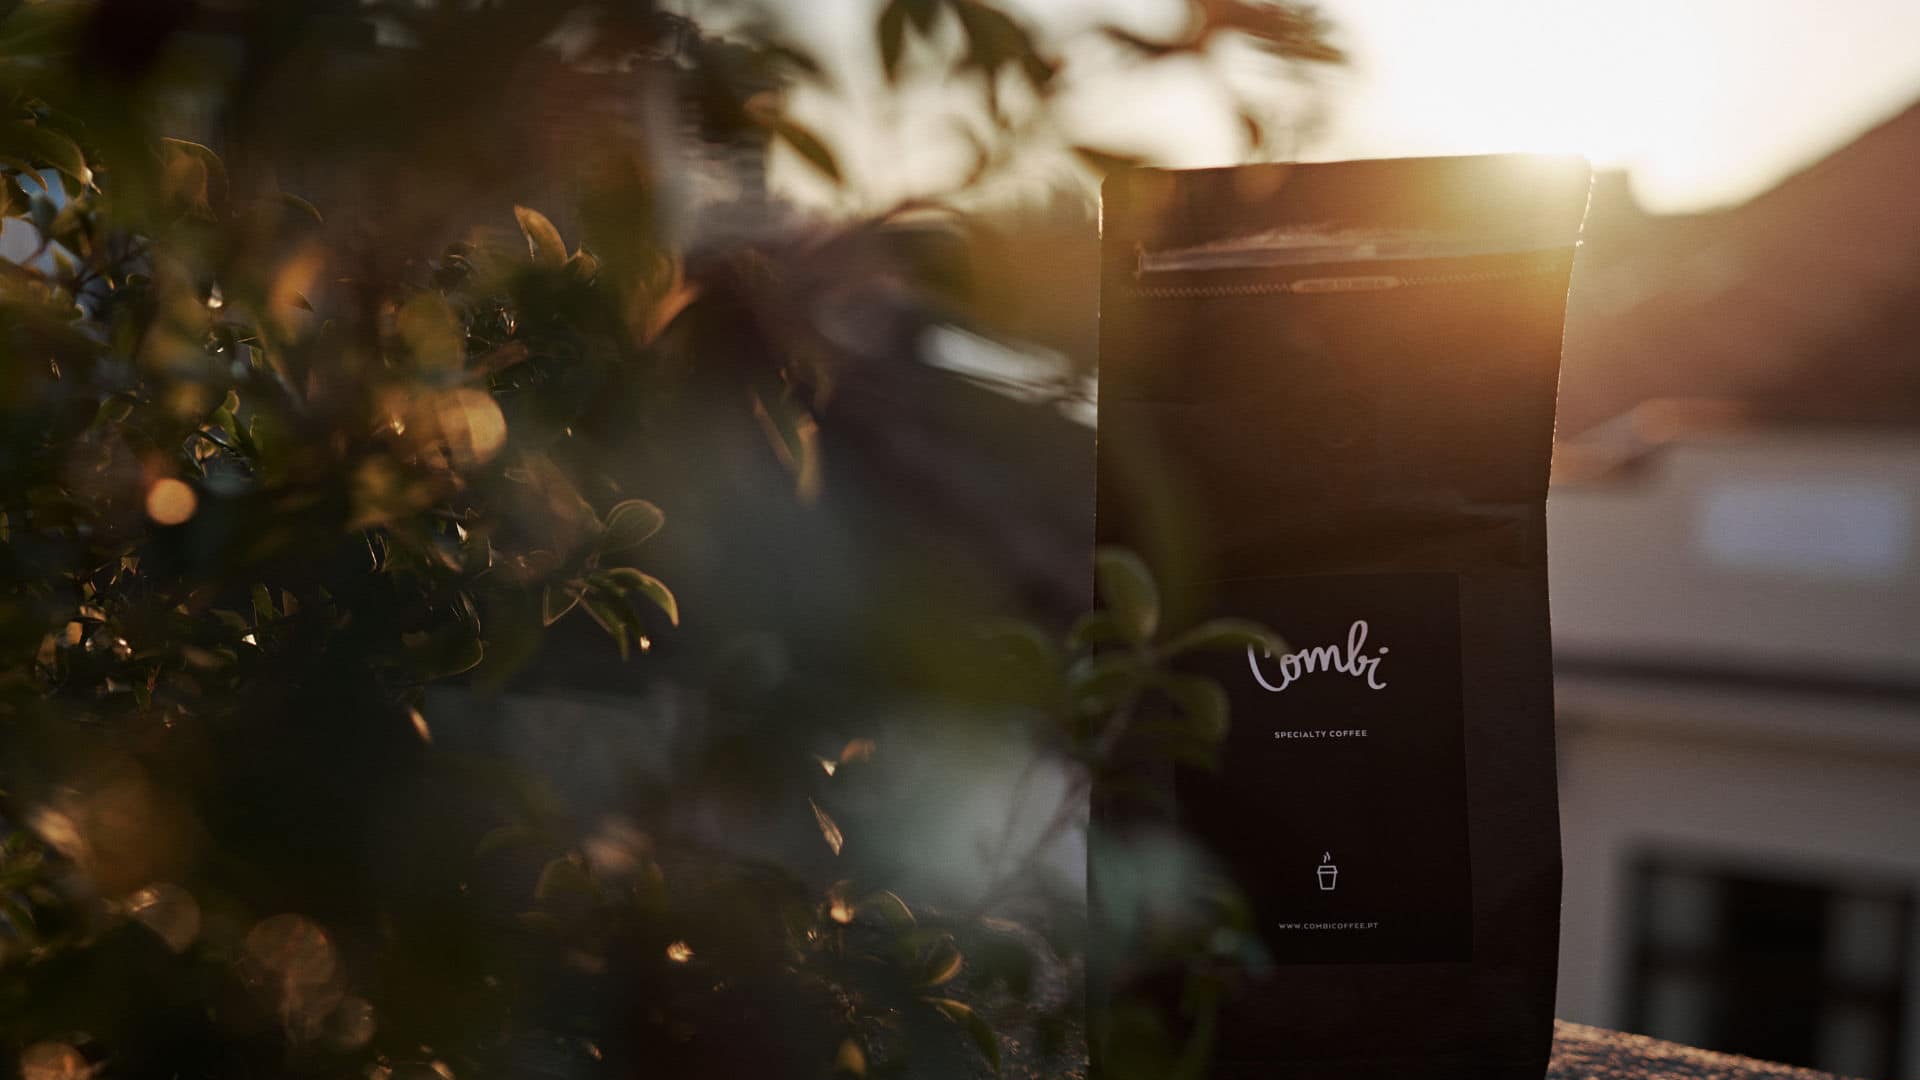
| Combi Coffee | Combi Blend | 50% Brazil, 30% Colombia, 20% Guatemala | ####m, ####m, ####m | Caramel, chocolate, vanilla | Various farms in Brazil, Colombia & Guatemala | 28.10.2020 | ✪✪✪ |
| Combi Coffee | Indonesia Mandheling Sumatra Triple Picked G1 | Indonesia | 1300m | Black currant, black tea, blueberry, lemon | Various farms in Mandheling, wet hulled, varietal: Catimor, Kent, S795 | 28.10.2020 | ✪✪ |
| Bajareque | Elida Estate | Boquete, Panama | 1850m | Honey, hazelnut | Lamastus family estates, Catuai variety | 27.11.2020 | ✪ |
| Bajareque | Elida Estate | Boquete, Panama | 1850m | Lamastus family estates, Catuai variety | 08.12.2020 | ✪✪ | |
| Monkey Fruit Coffee | Fuerte | Piedra Candela, Panama | 1600m | Finca Don Bosco, Catuai variety | 18.12.2020 | ✪ | |
| Island Grind Aruba | Colombia Antioquia | Colombia | ####m | Cocoa, cane, citrus | Medium roast | 06.01.2021 | ✪ |
| Island Grind Aruba | Peru | Peru | ####m | Apricot, grapefruit, molasses, chocolate, syrup | Medium roast | 14.01.2021 | ✪ |
| Island Grind Aruba | Brazil | Brazil | ####m | Creamy, caramel, chocolate, fruity | Medium roast | 24.01.2021 | ✪✪ |
| Island Grind Aruba | Ethiopia Harrar | Ethiopia | ####m | Blueberry, strawberry, cacao | Dark roast | 07.02.2021 | ✪ |
| Unido Coffee Roasters | La Harpia | Panama | 1300m-1600m | Dark chocolate, toffee, cherry | Espresso blend, Catuai, Caturra veriety | 26.03.2021 | ✪✪ |
| Unido Coffee Roasters | House Blend | Panama | ####m | Nuts, chocolate, citrus | Boquete, Catuai, Caturra variety | 30.05.2021 | ✪✪✪ |
| Cafe Suarez | Geisha Panama | Panama | 1684m | Lemon, orange, peaches, nectarines, jasmine, roses | Arabica | 08.05.2021 | ✪ |
| Don Pepe Estate Coffee | Bourbon | Panama | 1600m-2000m | Nuts, chocolate | Boquete, Bourbon | 29.07.2022 | ✪✪✪ |
| Bajareque | Espresso Bajareque | Boquete, Panama | 1000m-1300m | Chocolate, almond, spice | Lamastus family estates, Palmira Boquete, Catuai variety | 12.08.2022 | ✪✪ |
| Unido Coffee Roasters | Bonita Springs SL-28 | Alto Lino, Panama | ####m | Black currant, sweet orange, brown sugar | Alto Lino, Panama | 16.08.2023 | ✪✪✪ |
| KopiKing | Kopi Luwak | Indonesia | ####m | Cocoa, cherry | 04.10.2023 | ✪✪✪ | |
| Syra Coffee | Attikan Estate | India | 1220m-1700m | Cocoa, Clove, Cedar, Cinnamon, Stone Fruits | Sln. 795 variety, washed | 30.12.2023 | ✪✪✪ |
| Kona | Kona Peaberry | Hawaii | ####m | Brown Sugar, Fruity, Hazelnut | Batch Nr. 3451 | 09.01.2024 | ✪✪✪ |
| KALAS | Wildberry | ??? | ####m | ??? | Tasting package | 03.01.2024 | ✪✪ |
| Workshop Coffee | Single Origin | Langbiang Mountain, Da Lat, Viet Nam | 1500m-1650m | White flowers, black tea, red apple, malt, molasses, lingering finish | Double washed, 2023 harvest | 14.01.2024 | ✪ |
| das ist PROBAT | #1 | 40% Brazil Pico do Mirante Pulped Natural, 30% Guatemala El Morito Washed, 30% India Badra | ####m | Malt, chocolate, well balanced | Roasting machine: PROBAT; Roasted at: das ist PROBAT showroom in Seoul | 16.01.2024 | ✪✪✪ |
| Bean Brothers | Mexico Cabonach Decaf | Descamex, Chiapas, Mexico | ####m | Maple Syrup, Cacao Nibs | Typica, Bourbon, Caturra, Mundo Novo, Catimor, Sarchimor; Mountain washed decaf process | 17.01.2024 | ✪ |
| Anthracite Coffee | Ethiopia Djimmah Decaffeine | Djimmah, Ethiopia | 1700m-2200m | Pumpkin Yeot, Green Tangerine, Maplesyrup, Long Aftertaste | Mountain Water Process Washed | 25.01.2024 | ✪✪✪ |
| Manufact Coffee Roasters | Paul Gauguin | Colombia, Guatemala, Ethiopia, Indo, Costa Rica | ####m | Dark chocolate, hazelnut, toffee, milk powder, brown sugar, rich body | AG 48/53, Arabica multi-variety | 04.02.2024 | ✪✪ |
| Compile | Winy Berry | Ethiopia (70%), Colombia (30%) | ####m | Personal note: It smells like Ferrero Mon Cheri | 10.02.2024 | ✪✪✪ | |
| Kalas | Milkyway Espresso Blend | Sidamo, Chimaltenango, Kartaka | ####m | Roasted nuts, brown sugar, milk chocolate | Variety 74158, bourbon, S795, Sln9; Natural & washed | 21.02.2024 | ✪✪✪ |
| Unido Coffee Roasters | Abu Coffee | Cañas Verdes, Panama | ####m | Red fruits, orange peel, guava | Natural anaerobic processed | 05.04.2024 | ✪✪ |
Enjoyed this? Support me via Monero, Bitcoin, Lightning, or Ethereum! More info.